



Blog: BLOG: Adding a collection of videos to photography website (More Posts)
Having upped the rate that I take videos on my digital camera on a weekly basis now, I decided it was time to add a page to my photography website for adding the best of those videos to a web page. In this quick blog I lay out in detail how this will work.
Every bit of unique content on this page will live in a single section element. Each child item of the video container would contain an HTML Video element with 3 span elements containing brief details about the video.
Like this.
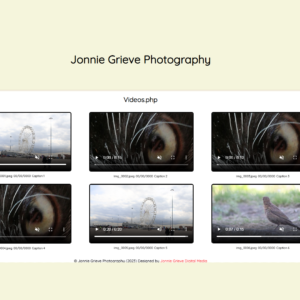
And for now, this is all it’ll be.
Creating the page
First, in keeping with the rest of the site, all styles to do with the video page will be stored in its own partial file.
@import "sass/pages/video";We can keep it organised as so with the section element with a class of “section_video”.
<section class="section_video"> . . . </section>The section element siphons out the video content from the other pages for the purposes of styling. To put this another way, the styles on this page should not and will not affect styling on other pages because the class attribute is unique to this page.
The article element (“video_container“) creates an area in the document so I can place the video elements. While the div elements are container elements for each individual video.
<section class="section_video">

    <article class="video_container">

        <div class="video"> ... </video>

        . . .

    </article>

</section>
In the video partial file, the selectors look like this a series of 3 nested selectors.
.section_video {

    .video_container {

        .video {

            video {

            }

        }

    }

}
Ordinarily, I use the CSS inline-block property on a containing element to put the videos side by side rather than stacking on top of each other as block elements do. This is a relationship between a containing element, which is set to block, either by default or set by the style author, and child elements.
However, I wanted to use Flexbox in this case
.video_container {

    display: flex;
    /* flex-direction: row; */
    flex-wrap: wrap;
    margin: 0 20px;
    text-align: center;

    .video {

        /* width: 100%; */
        /* width: 85%; */
        width: 28%;
        margin: 10px auto;

    }

}
When you use Flexbox though, all the browser can do is try to fit all the Flex Child elements in its container if it possibly can. We want the child elements to bleed onto new lines when space runs out but Flexbox doesn’t do that by default. The way to manipulate child elements to bleed to a new line is to use the Flex wrap property.
.video_container {
    display: flex;
    /* flex-direction: row; */
    flex-wrap: wrap;
    margin: 0 20px;
    text-align: center;
}
Next, we need to create the videos. Videos are of course native to HTML these days so it’s a relatively simple thing to add to a web page. Just add the file path and the filename to the source attribute.
<video controls muted poster="https://domain.com/path/to/video/videoplaceholder.png" title="video example 1 - on Canon 250D 75-300mm">

<source src="" type="video/mp4">
Leveraging PHP to store a reference to the placeholder, so I can change it in just one place.
Each video has a poster attribute, which allows you to use an image in place of the default video skin while the video is downloading or the video controls are yet to be interacted with. I’ve given an example of this below.
It’s a long URL however. And since I’m using the same URL to link to video posters, It would be better to assign this URL to a variable…
<?php
$video_poster = "https://jg-photography.s3.eu-west-2.amazonaws.com/photography/videos/placeholders/boo_videoplaceholder.png";
… and add the reference to the variable to the attribute using PHP.
<video controls muted poster="<?php echo $video_poster ?>" title="video example 2 - on Canon 250D 75-300mm">Here is one instance of a video
<div class="video">

    <video controls autoplay muted poster="<?php echo $video_poster ?>" title="video example 1 - on Canon 250D 75-300mm">

        <source src="https://jg-photography.s3.eu-west-2.amazonaws.com/photography/videos/MVI_6412.MP4" type="video/mp4">
        <!-- <source src="https://jg-photography.s3.eu-west-2.amazonaws.com/photography/videos/MVI_6412.MP4" type="video/ogg"> -->

    </video>

    <span>img_0001.jpeg</span>
    <span>00/00/0000</span>
    <span>Caption 1</span>

</div>
Missing menu on the videos page.
Having created the new page, one of the first things I noticed was there was no menu button and therefore no access to the navigation. In order to get access to all other pages on the site, I gave the page it’s unique identifier as a string variable. Just like every on other PHP Template.
// Page Variables
$page_identifier = "photo_homepage_videos";
Back on the homepage, I added one more check, in its own condition, and added the code via a require statement.
<?php if( $page_identifier === "photo_homepage_videos" ) { ?>

    <?php require "../template-parts/main_menu.php"; ?>

<?php } ?>
Conclusion